So far I’ve fermented my Tempeh and Koji in the oven with a plant germination heating mat and an internal sensor. This has worked fine, but needs quite a lot of manual handling, e.g. opening the oven door to let more airflow in, covering or uncovering the tempeh blocks with kitchen towel depending on what stage of fermentation it is in, etc. So I would love to make something a bit more automatically controlled, and better set up for routine fermentations. Also, I don’t want to block the oven for extended periods of time.
Inspo
Old fridge, ceramic heating element, temp controller, two computer fans: https://imgur.com/a/diy-temperature-controlled-fermentation-chamber-KuDFu11
Styrofoam box, humidifier, temp controller, humidity controller, perforated hotel pan: https://www.culinarycrush.biz/all/fermentation-chamber
Kitchen cupboard, reptile heating mat: https://www.americastestkitchen.com/articles/6855-diy-fermentation-chamber
Plastic box, microcontroller, heater, fan, OLED display: https://www.youtube.com/watch?v=tLW_WAPdoeg
- ESP32-C3 microcontroller (AliExpress, 2 EUR) or Arduino ⇒ works at 3.3 V
- OLED display to show temperature, humidity (AliExpress, 2 EUR)
- USB-C converter to output 12 V: to run fan and heater on more than 5V (AliExpress 2 EUR)
- 12V fan (AliExpress, 2 EUR)
- Step down voltage converter (AliExpress, 1 EUR)
- Silicone heating pad (AliExpress, 3 EUR)
- Input knobs
- DHT11 digital humidity and temperature sensor (AliExpress, 1 EUR) Apparently it’s not very reliable
- Mosfet transistor kit to control the heater and the fan, which are running on 9-12 V (AliExpress, 2 EUR)
Next iteration of microcontrolled tempeh-incubation chamber: https://www.youtube.com/watch?v=uAKlWe1nWns
Very well-designed fermentation chamber with RaspberryPi pico microcontroller, fans (in and out), heating pads, PCB, LED display: https://domingoclub.com/projects/domingo-fermenter Parts - or the whole fermenter - can be ordered from their website. Everything open source and well explained.
Building a fermentation cupboard
After some research, I settled on starting the project by following Domingo Club’s fermenter, at least for the electronics. For the layout and building of the actual box or cupboard I will not follow their design, but will instead use whatever materials I can find (ideally something insulating, like styrofoam), and make it to the dimensions that fit both my space and the other components such as shelves. I want to get as much as possible from second hand shops or recycling places.
Rough theoretical timeline
- Order electronic components https://domingoclub.com/products/fermenter-electronic-kit - 1800 SEK (incl. shipping).
- Measure available space and design a cupboard.
- Go to second hand shops and find metal components that seem useful. I would need: a metal sheet to conduct the heat from the heating pads, a few shelves/racks.
- Find suitable reusable containers for the tempeh that fit the shelves and result in good dimension of final tempeh. Needs a lid that sits tight on top of the tempeh to avoid fluffy, uneven surface.
- 3D print components (for cupboard, but potentially also for tempeh moulds).
- Assemble the cupboard.
- Assemble the electronic.
- Put electronics into cupboard.
- Make some tempeh.
Actual timeline
- Electronic components: Ordered electronic components (Feb 2026) from Domingo Club. Arrived 3 weeks later.
- Design cupboard: Got a Eurofins styrofoam box from work that fits well under the IVAR shelf we have in the living room next to the kitchen.
- Find metal racks: I tried to find suitable racks or metal sheets, but it was too tricky to get something that was the right size. In the end I bought these Culimat ones from a local kitchen shop. More expensive than I wanted (300 SEK), but they are nice and stainless steel, so also useable in cooking or baking, and they fit perfectly.
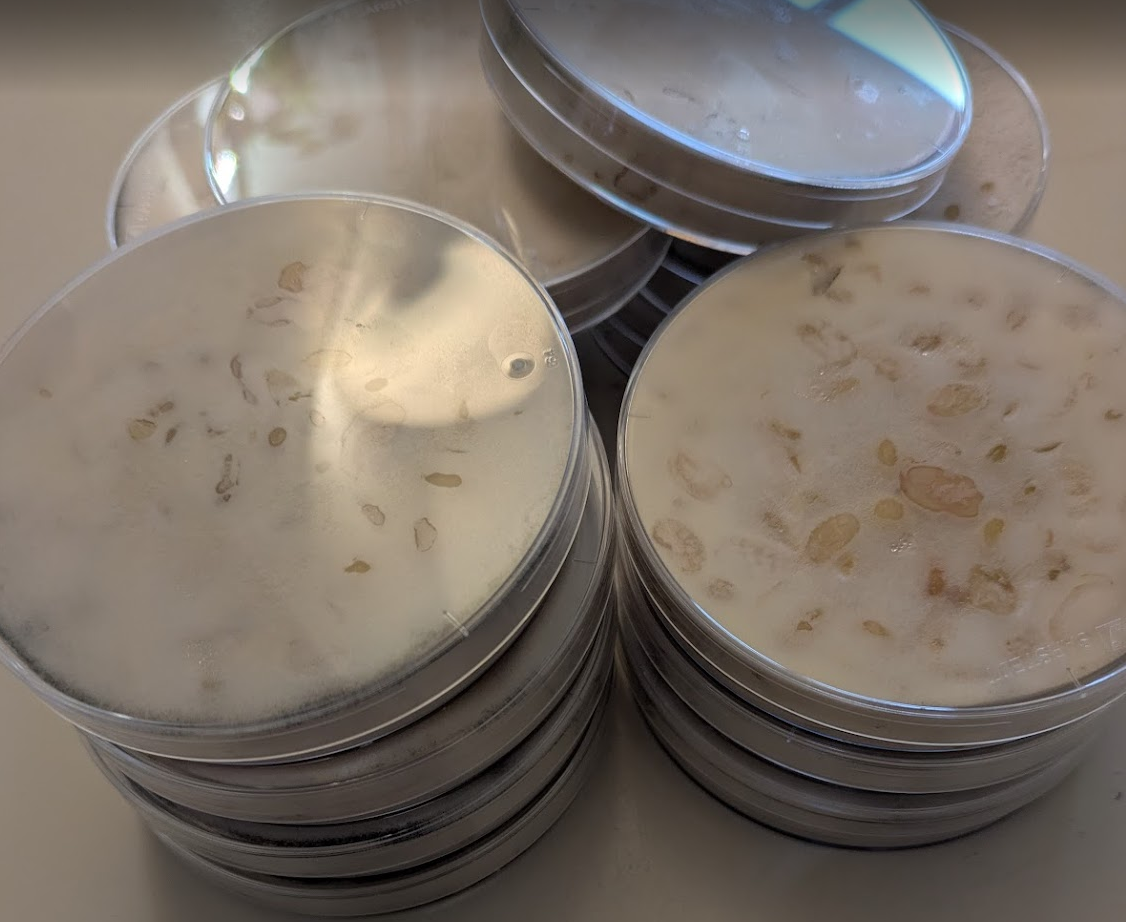
- Find tempeh containers: As reusable tempeh moulds I first thought about using some glass or metal lunchboxes I have. But they are quite high, making the tempeh very thick. So I brought some plastic petri dishes from work. They are not really food grade, but they are just PS plastic. Should be fine. I will try the lunchboxes later on, or maybe order some nice glass petri dishes online.
- 3D print parts: Didn’t need to print any parts for the cupboard, and some research online also suggested that 3D printed tempeh moulds are not very resilient and get really brittle after a few uses. So skipped this for now.
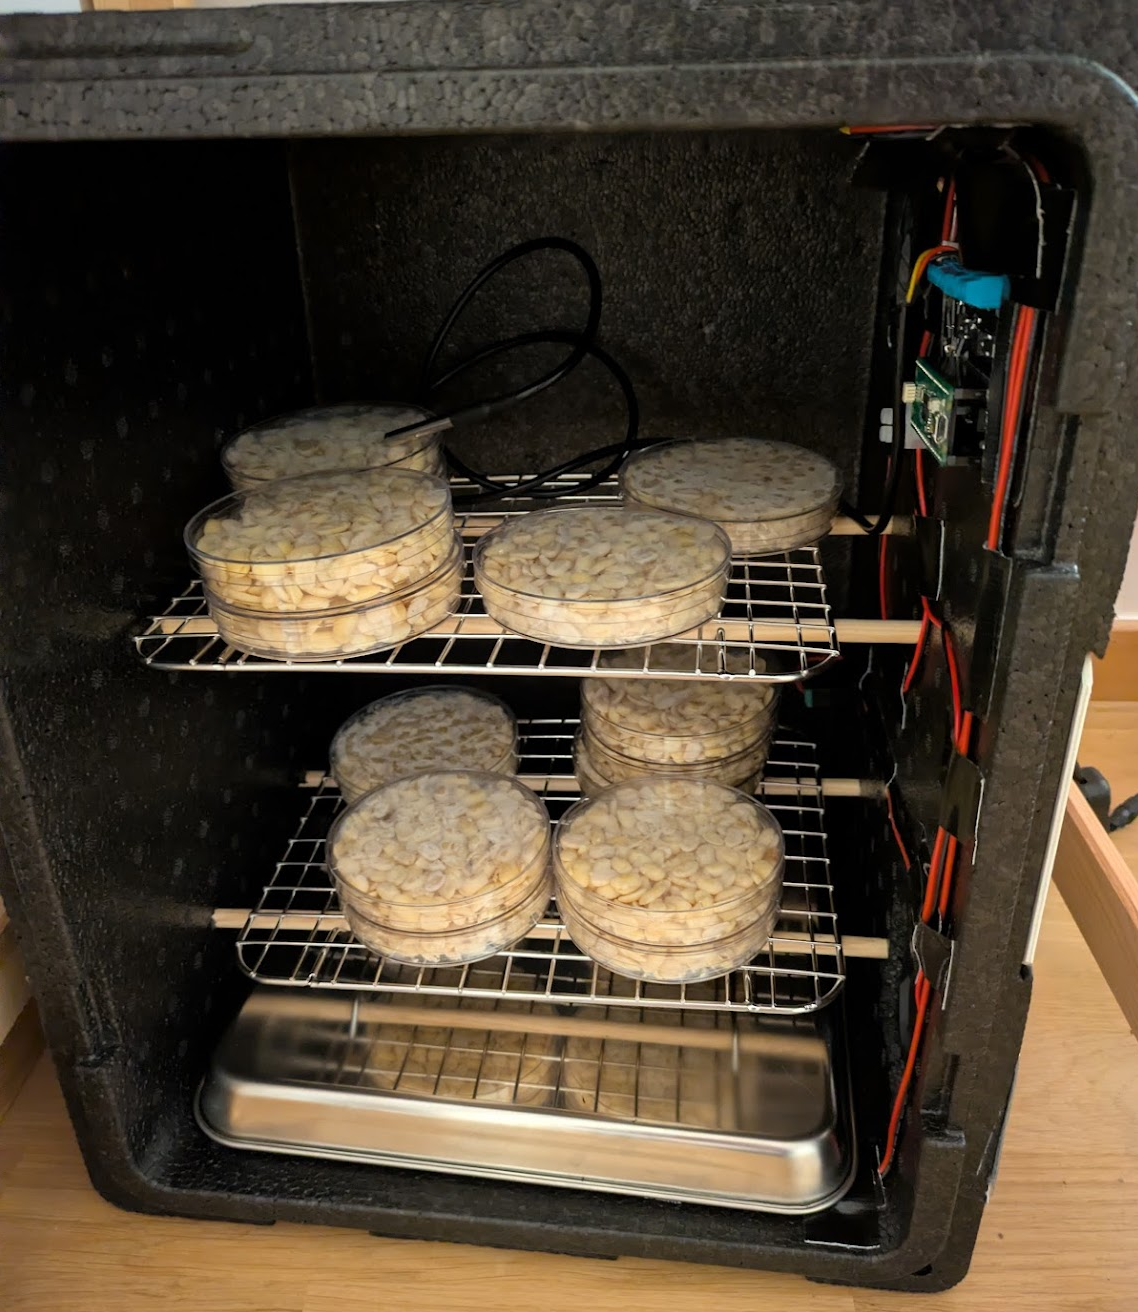
- Assembling the cupboard: Styrofoam was very easy to work with. With a big Stanely knife I cut out holes for the fans and the LCD display. And to hold up the metal racks I bought some wooden sticks from Slöjddetailjer and basically punched them through the box from one end to the other. This took one evening (3ish hours).
- Assemble the electronics: Pretty easy with good instructions from Domingo Club. Just needed a tiny screwdriver, wire cutters and wire strippers (all of which I already owned). No soldering needed - which makes it also nicely adjustable later, and the components reusable. This took about 1h.
- Put electronics into cupboard: I attached the cables, PCB board and fans to the box with Gorilla tape to make it all look neat. This took about 1h.
- Make some tempeh: Used my usual conditions described here: Best tempeh practice. This time I used dehulled soybeans. What a godsent! No more tedious dehulling. I soaked them during the day (10h), then cooked them in the evening for 50 min. Drained, dried, added vinegar and starter culture, then pressed into the petri dishes, distributed them on the shelves, and started the program.
The final result - fermentation cupboard
The final result - first tempeh making
Soybeans just before they go into the fermenter:

Ready to be fermented:
I was a bit worried letting the fermenter run when I was out of the house, so I occasionally switched it off for a bit. The “program” was a constant 30C for 48h, so not very complex. In the end the tempeh only needed about 30h before I stopped (it started showing some black spores on the air-exposed edges of the petri dishes).
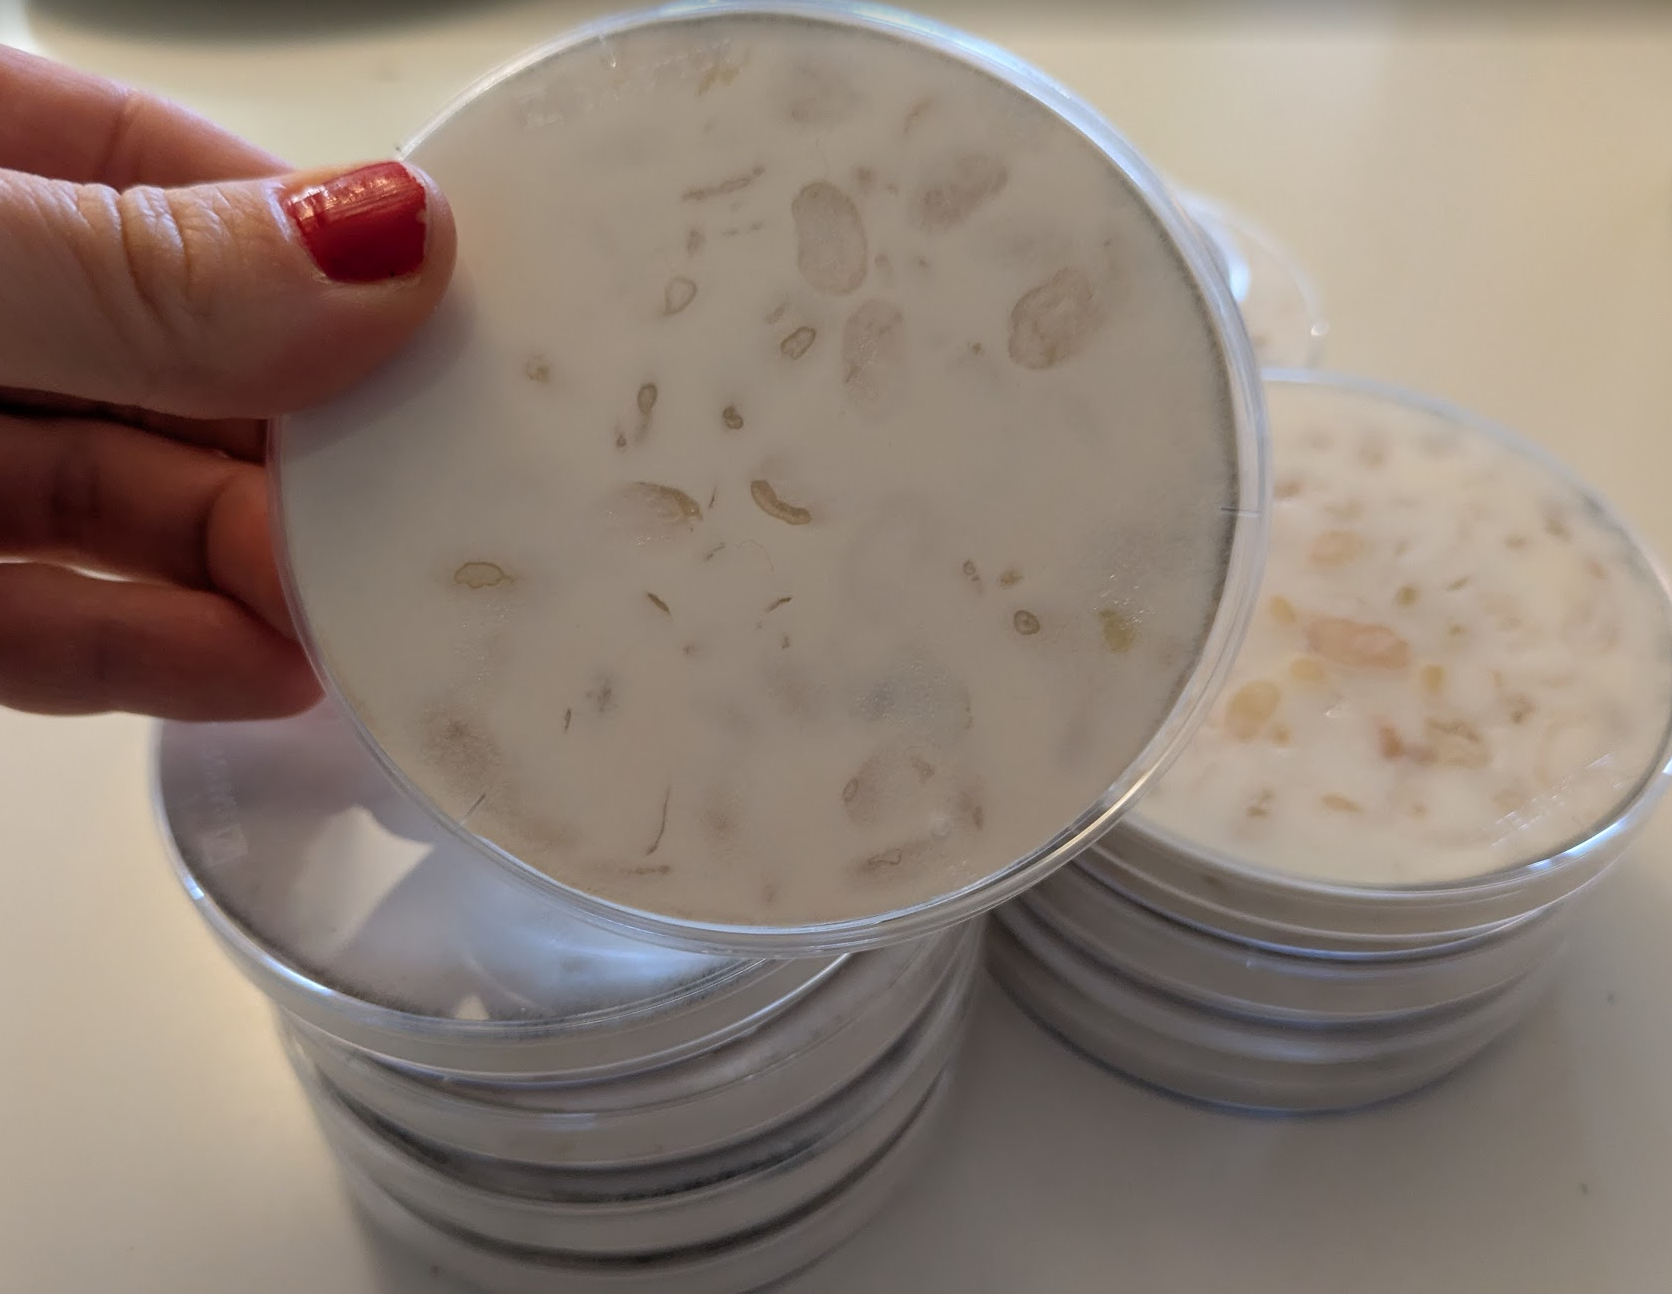
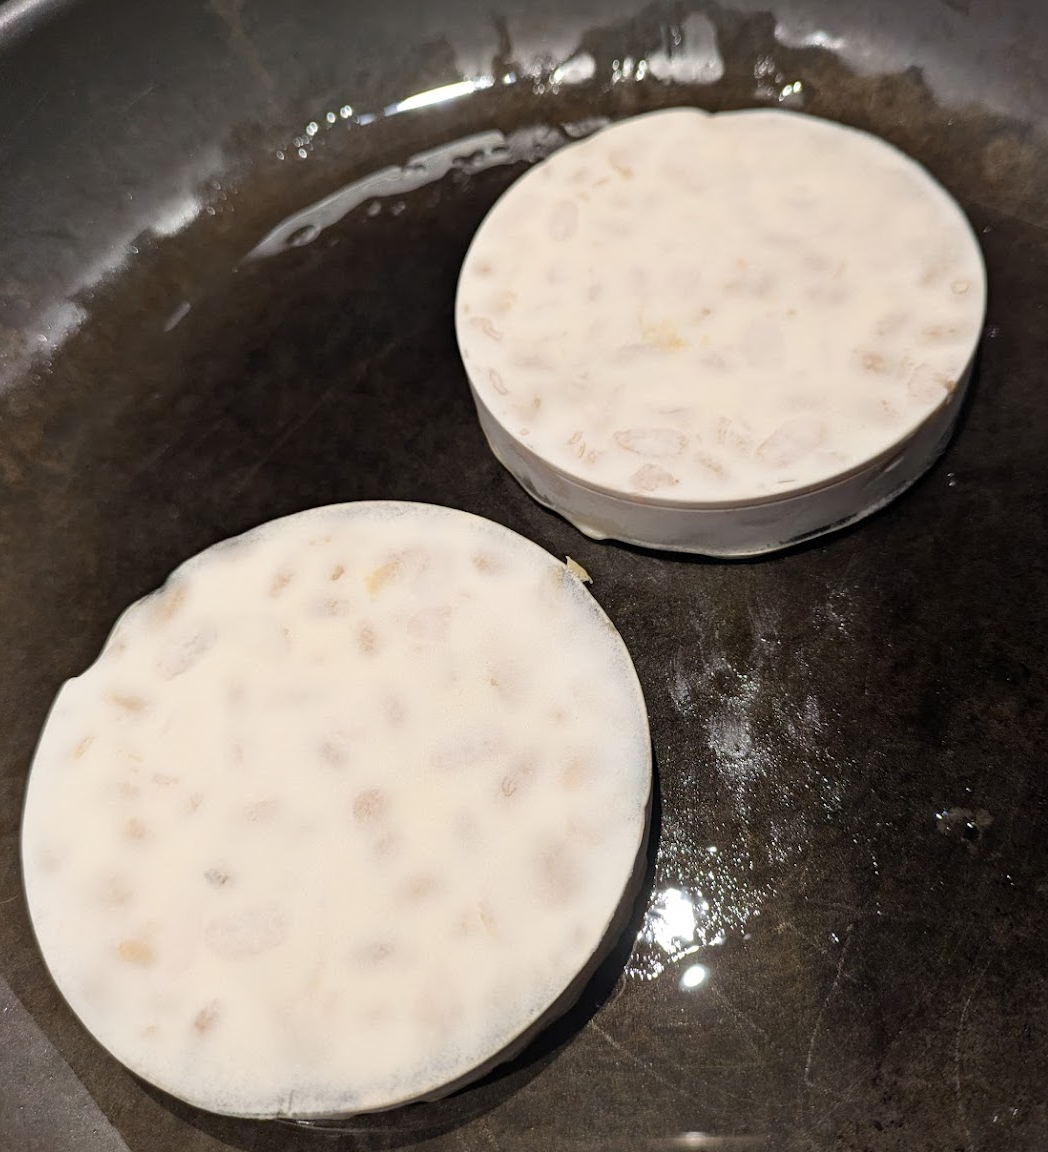
I got some beautiful fluffy discs that just very faintly smelled of mushroom. I fried some in oil and ate them with Bulldog sauce, and also prepared some for Banh mi with a peanut-sriracha sauce. Both were DELICIOUS. I froze the rest of the discs for later use.